So I have to start by giving credit to Miss Martha for the original design of these paper sack flowers.
I wanted to share my steps too, to give another perspective.
I absolutely love how they look in the very simple material of brown paper lunch sacks, and by adding centers, there is no limit to the decor possibilities! :)
I wanted to share my steps too, to give another perspective.
I absolutely love how they look in the very simple material of brown paper lunch sacks, and by adding centers, there is no limit to the decor possibilities! :)
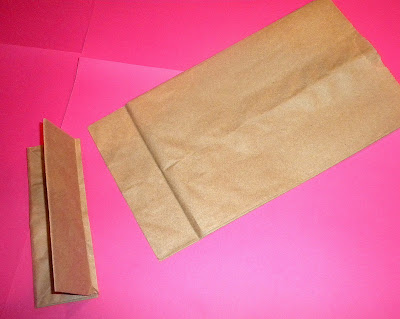
Step 1
Fold the bottom of the bag so that the flaps are flat on both sides, instead of one sticking up on one side.
Step 2
Cut off the bottom of the bag just above the middle fold.
Step 3
Fold entire thing in half so that when you cut your petals, they are even.
Then cut the top into a petal shape (this is not an exact science and they look cute in whatever shape you make the petals, it's fun to experiment with your cutting, just make sure it's the same for all 6 petals of one flower.)
Step 4
Repeat steps 1-3 five more times so you have a total of 6 petals.
Step 5
Stack your six identical petals and punch a hole in the bottom, right on the middle fold line so it's centered.
Step 6
Using double sided tape, put tape between each petal so they are all stuck together. The tape lines are hard to see, and this is another place where it's good to experiment. If you put your tape to high on the petal, they will be so stuck together that they won't be able to open into a flower. If you put it too low, your flower could be droopy. So you want the tap somewhere in the middle of the petal so that it connects the six petals in such a way that they can fully open and stay that way without drooping.
Step 7
Tie a piece of string or fishing line through the holes. This will be what hangs your flower, so keep that in mind. Leave at least a finger's width of space when you tie your loop through the holes; if you tie too tightly, the petals won't be able to open up.
Step 8
This may be the trickiest step and it helps to have some extra hands. You now open up your petals to complete the flower. The last two petals still need to be connected and you want to make sure the string is going straight up and the tape or glue you are using to stick the petals together is on either side of the string so that your finished flower hangs straight.
*Depending on your double sided tape's strength you may want to try different adhesives to connect the petals to each other. I ended up hot gluing them on the last one I made because my dollar store tape was not holding.
Step 9
The finished flower, yay!
And here it is hanging up. So simple and sooo affordable!
:)


Comments
Post a Comment